Friday, February 3, 2017

STEM in First - Marble Mazes

I planned this STEM activity based on the random supplies I had in my classroom (paper plates and straws). By planned I mean I typed into Google "paper plates + straws + stem" at 3PM in my classroom with my purse on my shoulder and one foot out the door. 

I found this post and loved the idea of a marble maze challenge and knew straws would make perfect "lanes". I borrowed some marbles from my school's STEM coach and we were ready to go the next morning. It turned out to be the best STEM activity I've ever done with a class! They were excited and totality engaged. From design, construction, trial/error, and a post-discussion, they were completely into it.

First, I showed them this video. It was kid friendly and a great example for them. We talked about how the maze in the video has a starting point and an ending point but also some tricks in between - the dead ends. We also noticed how the marble needs to be able to fit through the "lanes".
Get this freebie planning sheet here.

They did an awesome job designing their mazes on their planning sheets and when it came time to finally build they couldn't wait. They sketched their plans onto their plates, cut and then taped the straws to create their very own game.


A little bit into our construction, I passed out some sheets of foil and they added tunnels to their mazes and some even created little walls. They really impressed me with their thinking!

Once our time was up we played with each other's mazes and gave suggestions and compliments to each other on our designs. I plan on leaving them in our classroom as a game the kids can enjoy throughout the year.


It felt like they had a lot of great opportunities to talk to each other, really work with each other, and make something successfully that they really thought was cool. And they got to play! 

Grab the free planning sheet HERE.

Thursday, January 19, 2017

Organizing Reading and Math Rotations with PowerPoint

Hi! I wanted to share some info on a timed slideshow I use in my classroom to organize my reading and math groups. In previous years I have used either a pocket chart with cards, a clip chart, or a projected pdf file to show my students where they go during their centers. All worked fine but I wanted a way to control my rotations without having to really do much of anything - ie move the clips daily, ding a bell, set a timer. Doesn't sounds like much but you know how it goes when you have 16 kids moving around the room! You need to have your hands and eyes free. And really... I just wanted my rotations to run themselves. With this slideshow that's exactly what they do.

I can set the slides to any amount of time I want. It's really simple. Here's how I do it:

Open up the presentation and click on "Transitions". You'll see a option to change the timing all the way to the right on the screen. You can change the minutes you want each slide to last by editing the first two numbers. Click on the box next to "After" to make sure your slideshow runs itself (If you select "On Mouse Click" the slide will not change by itself after the allotted time.)

(Click the images to enlarge if needed)

You can also change the sound the slide makes when it switches and the duration of the sound. Select the drop down box labeled "Sound". Preview your slideshow to hear the sound.


That's really all it takes to create a unique center rotation slideshow that fits the needs of your classroom!

You can find these editable rotation boards in my store. You can add your own clipart or use the already designed board. I tried to use clipart that was generic to math and reading but designed an option that allows you to add your own clipart or copy and paste images. There are board options for rotations of 3, 4, or 5 groups.

Check out the Colorful Chalkboard rotation boards *HERE* and the Teal and Grey rotation boards *HERE


Saturday, January 7, 2017

Nonfiction in First: The Arctic


Before winter break began, my first graders finished up their nonfiction unit. We reviewed the differences between fiction and nonfiction, learned a few text features and how they can give us information, and we learned lots of interesting facts about the Arctic and its animals.

We also learned about igloos! We labeled the parts of an igloo after reading an article and watching a few videos about how they are constructed and then we built our own. We did this activity at our Polar Party and it was their favorite!


No party is complete without dessert!
I got all the supplies at the dollar store: frosting, Styrofoam cups, paper plates, pop sticks for applying frosting, and mini marshmallows. Here's where I got the idea.

Another activity  I would recommend if you are learning about Arctic animals is this blubber simulation experiment. All you need is some Crisco, baggies, and ice water in a bucket. I've seen this idea many different times online and I am not sure where it originated but it's awesome. It's a really fun way to drive home some arctic vocab words like INSULATE and BLUBBER too ☺

The kids loved learning about Polar Bears so at our Polar Party we also created some multimedia Polar Bear art.

If you're studying the Arctic following my Pinterest board for some fun ideas.


We also did this adorable activity after reading Sneezy The Snowman. This free download is by Loving Teaching Inspiring. Thank you for the awesome idea and book recommendation!

Mix up some glue and shaving cream (I just eyed it) and add your snowman parts. I  googled "snowman parts printable" and found this resource for all the cute snowman accessories.

Our next unit is all about fictional characters and building reading fluency. I look forward to doing some Readers Theater and reading LOTS of Mo Willems!

Back to school on Monday. Time to go make the most of my final weekend of freedom.


Monday, December 26, 2016

Nonfiction in First - Thanksgiving

One of my 2017 goals is to blog more.  Most of the time it feels like I need to ignore my kids to write so, my posts often get left in the dust. I have got to figure out how to stay up past my bedtime - and my son needs to figure out how to fall asleep before 11pm! Anybody else have kids that just don't sleep!? Currently, I am writing my month-late Thanksgiving post while my kids run in and out of the room leaving messes in their wake! We just returned from Disney World and their Christmas high is still lingering even in the aftermath. At this point I'm just following them around with a dust pan and broom. So, about November...


My class and I did some fun activities centered around the Wampanoag this year. We crafted Wetus (after using this amazing resource by AisforAdventuresofHomeschool to read about them and how they're constructed in a kid friendly way) and we "planted corn" the way Squanto taught the Pilgrims, and we made Thanksgiving timelines too. I used this resource by First Grade Wow to teach about The Five Kernels. I had never heard about this legend before and the entire resource is great. And free! Go download it now! For the timelines, I used an activity from a pack I bought my first year teaching. It's also awesome. Teachers are some of the most creative people!

We enjoyed our candy corn, Goldfish, and Oreos after we planted them.


Hosting Thanksgiving at my home has become tradition and I had fun this year decorating with my mom. We cut some greenery from our yards and found Styrofoam gourds and pinecones at the dollar store to create centerpieces. I also used some authentic falls leaves my aunt sent me from Massachusetts a few years ago that I saved. I'm from Florida so an authentic fall leaf is a thing to me! Haha!

I also love to use the leaves during the Fall season in my classroom. I usually read There Was an Old Lady Who Swallowed Some Leaves and Fancy Nancy Fall Foliage before we explore the many shapes, sizes, and colors, of these strange alien objects known as oak tree leaves.

I also made a Cookie Butter Pie for Thanksgiving. It was insane! Here's the recipe I used and I would encourage you to try it for sure. Next time, I think I would do mini pies instead! My daughter made a very cute apple pie. Check out the cute leaf cut-out crust!


I love teaching nonfiction during the months of November and December because between Thanksgiving and winter, there are so many interesting topics. Our December was packed with polar bear and penguins and we also learned a lot about the Arctic. We did tons of KWL charts to anchor our learning, fun experiments, and constructed igloos with icing and marshmallows. I'll be posting those pics soon.

I hope everyone is enjoying their break so far. Happy Holidays!


Sunday, October 16, 2016

Cookie Cutter Writing Centers


I have had this pack of cookie cutters that a friend gave me (They were actually part of a #SecondGradeTribe tribe box she sent me! Thanks, Tara!) in my classroom cabinet for a year. I knew I wanted to keep them for something but aside from sugar cookies I had no idea what. Then it randomly dawned on me last week to use them in a seasonal writing center.


 I put the cutters in a bin along with the picture that came with the pack for the kids to use as inspiration. I think it will also be a good idea to label each picture so that the kids can use those words to write their stories. You could also include a Halloween word list. *If you're looking for other Halloween writing ideas click HERE and HERE* 

This is the story we wrote together in a small group, which is how I like to teach most of my center activities
My kids really loved the idea! When I modeled how to trace the inside of the cookie cutter shape and then add details and color, they were literally Ooooing and Ahhhing. It was awesome. They got really creative with their ideas when we were working on a piece together and said I should put a witch in the haunted house window. We wrote the story from her point of view. I was so impressed with their thinking.

 This simple center is so easy to put together and I can't wait to use the same format with all my holiday cookie cutters!


Wednesday, October 5, 2016

Hurricanes and Halloween in First Grade

Lately, I've been a bad blogger but a super okay mom and teacher. I CAN'T BE EVERYTHING TO EVERYONE ALL THE TIME!!!!!!Okay??! *insert crazy eyed emoji*

Here are my excuses:
1. I moved. (Please see: I guess I'm living in Florida 4EVA because that's never happening again. Girl bye.)

2. I traveled. On a train, to New York, with two kids under five. There were fun parts. I swear.
3. I switched grades. (2nd to 1st and wow what a difference! I miss 2nd grade but I also like 1st a lot it turns out.)
4. I fall asleep dead nightly as soon as my youngest's eyes shut.

I don't know how some of you ladies do this juggling teacher-mom-blogger-etc. act but I'll have whatever you're having with an extra shot.

Nonetheless, we've been pretty busy in our first grade classroom so far this year and we (mostly me) are very excited that this mysterious season called Fall is upon us. I think it's a time of year when the air cools and leaves (not palm frawns) turn brown. Here in South Florida we half-heartedly have ICED pumpkin spice lattes and wait impatiently for January temperatures to make us feel like we get at least one seasonal change. 

We are currently bracing for Hurricane Matthew who should be arriving tomorrow night to my area. Safe wishes to everyone along the treasure coast and the Carolinas too. My students know there is a storm coming so in an effort to make light of the situation we read the classic tale Cloudy With a Chance of Meatballs and wrote about what we would want it to rain instead of meatballs (Spoiler Alert: ice cream and cupcakes were the clear winners). Of course I don't have a picture of their writing because BADBLOGGER. (We used this perfect freebie for our writing and cut out pictures of our favorite foods from my unhealthy sized collection of Food Channel magazines.)


Follow me on Instagram @sharpinsecond

Fall is supposed to mean Halloween not hurricanes! And Halloween math centers are my favorite. Here is a fun way we are practicing our addition facts. I wrote numbers 5-9 on the cauldrons and then number sentences on the sticks for every fact (and tried to reinforce the commutative property). I also created a fact checker page for them to use when they finish sorting. The cauldrons were $1 at Target.
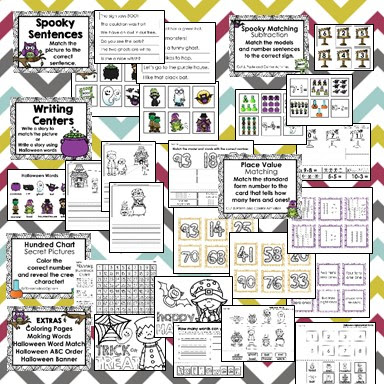
I had a lot of fun making a Halloween themed math and literacy pack to use this month with my first graders too. I love Whimsy Clips Not-So Spooky clipart. So cute! I think my kids are going to especially love the writing centers and the picture prompts! I also wanted to include place value seat work and math centers since we will be focusing on those concepts (oy vey) until November. Click {HERE} to check it out.
https://www.teacherspayteachers.com/Product/Halloween-Math-and-Literacy-for-Young-Learners-2799439

{HERE} is a freebie for you from that pack too!

This year I have also been using a self-running PowerPoint presentation I created to run my reading and math groups. The CLEAN UP slide and defining *chime* noise has really helped get my kids better at transitioning to their next center but we are still workin' on it. Click the picture below to see the rotation board options I have listed in my tpt store.

https://www.teacherspayteachers.com/Product/Editable-Center-Rotations-PowerPoint-Colorful-Chalkboard-Theme-2757027
This marks my fourth year teaching and I am starting to feel like I have much more of a handle on a lot of the nuances of running a classroom. I'm excited to see where the year takes me as I am told first graders grow so much in just one short school year! There is tons of foundational learning going on and it's already pretty cool to see how far they've come since day 1. I will post some more from our classroom soon - here's hoping the power isn't out too long. Hurricanes are no fun. Stay safe everyone!!!!


Sunday, April 24, 2016

I Failed at Flexible Seating


Updated 7/29/16: Hi and thank you so much for stumbling upon my blog! The below post (from  April 2016) was written as a way for me to document my experience with alternative, or flexible, classroom seating. It's not meant to persuade you against the concept or to say you shouldn't try it out in your own classroom! I was inspired to try it in my own room because of the many amazing teachers that have made it work so wonderfully for themselves and their students. Going full throttle into it wasn't for me but I love letting my students have some freedoms of course - standing to work if needed, working with clipboards on the rug, fun reading seating, etc. Having reflected on my own experience since publishing this post, I think I struggled a lot with how my students would cope the next school year in a desk. Was I setting them up for failure by giving them too much choice? That's question went through my head a lot. But I digress!

Flexibility is the backbone of teaching and I also believe in life you must take risks. I suppose that's why I jumped head first into transforming my room to begin with. I have no regrets! What I'm trying to say is... If you feel flexible seating could work for your class I hope you'll go for it! Let us know in the comments how it goes.

--------------

Back in November I blogged about how I had transformed my classroom with flexible seating, otherwise known as alternative seating. I jumped head first into the idea that my students would choose their work space and get down to business and that each day would be buzzing with the hum of productivity and engagement. That was the idea. The reality looked and sounded a lot different. I don't consider myself a super traditional person. By that I guess I mean that for the most part, I like to take risks and try new things. I immediately thought flexible classroom seating would be a perfect fit for my teaching style. Turns out I am much more traditional than I thought. My mom will be so excited!

I failed at implementing flexible seating in my classroom. I just couldn't make it work. I could list reasons for why I think it didn't work out but I fear they may sound a lot like excuses. Perhaps they are. I really wanted to like the new set up, to trust my students' decisions and partnerships, but as the days passed, I knew alternative seating wasn't going to work for me or my kids. Add a couple days of substitute teachers and I was truly over it!


via the Corner Stone for Teachers Facebook

Like a lot of things in life, my big plans fell short of what I expected. I couldn't manage my students' behaviors or needs as well when they were choosing their own workspaces. I fully believe that kids need movement and hands-on learning and they still get tons of that but when I switched my students back to assigned desks, I couldn't help but feel a sense of failure. Why couldn't I make it work? Why can't my classroom have the same vibe as the classrooms I see on Pinterest with their stability balls and fancy couches? WHY don't they understand that stability balls aren't meant for rolling yourself across the room?

The answer for why I failed is probably simple. I wasn't buying into it 100%. I worried about how my students would cope next year in a traditional desk scenario. I dreaded daily transitions. All the walking around made my eye twitch! And I worried that I was going to cry if they didn't stop talking off topic so much!!! The whole vibe of my classroom just felt off.

Since I've switched back to traditional seats, we've been engrossed in an author study, researched rainforest animals, experimented with rainbows, and so much more. I realized I don't need to make a grand classroom change in order for my students to thrive and learn. I'm not sure if it makes me a better or worse teacher but for me, a traditional classroom has just been a better fit this year.

Now if you'll excuse me I have some stability balls to deflate.


Saturday, April 23, 2016

Using Playing Cards For Math Centers and Why It's AWESOME


The concept of using playing cards for math centers is not a new one. It's an awesome one though! In previous years, my math centers consisted of mostly printing, laminating, bagging, repeat. Switching them out constantly gets overwhelming for me. And cutting lamination loses its allure reeeeal fast. Switching out centers weekly causes me anxiety! Call me lazy but the rare few minutes I have alone (mom of 2 under 5 here) mustn’t be wasted cutting out a math center my students might use for a week. I still LOVE a lot the printables I have purchased and, when a unit calls for them, they more than work. When I discovered how much diversity a deck of cards could lend to my math block, the almost complete switch however, was a no-brainier.
 Students love playing with cards because they truly feel like they're getting away with just playing during math time. The novelty doesn't wear off either. My card centers have been going strong all year. Each time I introduce a new card game the "oooohs" and "ahhhs" resound.

 I teach second but card games are adaptable to meet the needs of any grade level. The list I have assembled of my top three favorite math center card games are geared towards primary aged students but you may be able to adjust by slightly changing the rules or objective. Check out them out!

 (All games require you to remove the Kings, Queens, Aces, Jokers, and Jacks unless otherwise noted)

 1. Flip Three, by Who’s Who and New

Description: A memory game of sorts where players aim to create a meaningful equation with the three cards they flip. Number of players: I find 4-5 works best Rationale: Students are using and fine tuning number sense as well as practicing fact families. They also must pay close attention as their opponents choose cards so they can make smart choices when their own turn comes. I like how this game challenges their focus and tact. How to play: Arrange your cards into five rows of seven facing down. Player one flips three cards over, leaving them on the board. If those three cards can make an equation they take them. If they don't they flip them back over and the next person goes. Play until there are seven cards left on the board. Player with the most cards wins!
Please observe my weenie dog cards and be jealous!
 2. The Greatest Game, adapted from education.com

Description: I use this game to help students practice double-digit addition. You can adapt it to two-digit subtraction or to three digit addition/subtraction as well. Number of players: 2-5 Rationale: Students are practicing comparing numbers, facts, and regrouping and/or borrowing skills. They are also creating arrays! How to play: Remove the 10's from the deck (as well as all other face cards). Each player gets four cards. They arrange their cards to create two of the biggest two-digit numbers they can. The cards should be in two rows of two cards. Everyone adds their own cards up to reveal who has the biggest sum. The winner takes everyone's cards. You can add a one-minute timer if you feel the group can handle it! Play until you're out of cards! Winner is whoever has the most cards. To adapt to three-digit adding or subtracting, give each player six cards instead of four.


3. Make a Ten Game, adapted from a sweet blog post by Math Coach’s Corner

Description: The game is simple and isn't set up for a singular winner. It's more of a group effort type of game. I use this game to drill ten’s facts into my student’s heads! It can get noisy. Be forewarned! This game also has a fun surprise at the end.
Number of players: 4 maximum Rationale: Students are practicing ten facts which are crucial to adding and subtracting larger sums. They are also doing a bit of missing addend work. How to play: In this game Aces = 1, so leave the Aces in the deck but remove all other face cards. One player will choose one card and place it face down off to the side (No peeking!). The rest of the cards will be laid out face up into five rows of eight (one row will only have 7 cards). Each player gets a turn choosing cards that combine to make ten. They must say the fact out loud as they pick up the cards! For 10 + 0, they will just pick up the 10. If you want to add extra suspense for your students that have their tens facts pretty much mastered, add a one-minute timer. Once there is one card left, the group must guess what the secret card is (ya know, the card we picked out and didn’t look at before we laid out the cards)! They love that part.
Ace = 1

So that’s it! These three games have kept my students busy all year. I occasionally throw in holiday themed centers and I do still have a few laminated centers as well, but the cards are the STAHS!!!

One last thing! Since different games require the deck of cards to look different, I like to keep my decks in soap containers. I label each soap container on the bottom with which games that deck goes with. Some decks will work for multiple games.

I hope you enjoyed this post and got an idea or two for your math centers!


Saturday, March 19, 2016

Spring Activities

Spring Break is upon us as is the end of my professional certification courses. I see the light!  

We've been busy in the classroom this month and having fun with St. Patty's and weather. 


This week a leprechaun came to visit and the kids were SO amped up on catching him. They designed traps with simple materials in mind on Tuesday and we built them on Thursday. They were so engaged and worked so well together for honestly the first time all year. I suppose that is proof of the theory that if you engage even the toughest classes enough you will see results. 


I was really impressed by how their traps came out. The leprechaun left them a treat (green gems, gold coins, and Rolos!) but they were pretty bummed that the little guy hadn't been caught!


We also wrote similes about leprechauns!


Learned about clouds and rainbows...


After a simple experiment where we used a mirror, sunlight, and a cup of water to create a rainbow, we talked a bit about prisms and created a spectroscope. 


I can't wait to continue our weather unit in April. After a fun filled (and exhausting!) week, I sent the kids off with a little treat to start their break. 


I also made a little something for my team mates that I just love!


Grab the editable tags HERE. Please note that the fonts are VERY similar but not exactly as seen here due to licensing. You can check them out in the thumbnail on tpt:)

Have a great break!